ARTimus Prime is your destination to check out all the projects going on at the Fountain Lake Cobra Digital Prep Academy. Bookmark this page to check back here all year to see what we are doing in the Art Room and to keep up with all of your assignments.
During this lesson, we will take a look at graphic design, basic color theory and different color schemes used in art.
After completing a color theory worksheet you will create four unique soda can designs. Each can must include a different color scheme,different logo, design, and original name. We will also take a look at the graphic design process and discuss logos in society.
For now take a look at the websites below to get some inspiration and instruction in color theory and graphic design.
HERE is a site on basic color theory that lists some color schemes.
Here is a video that will explain all ten color schemes that are discussed in class and on your worksheet.
Day 1- Color Theory Intro
Compelete the worksheet on color theory.
Day 2-4 Soda Can Logo Designs
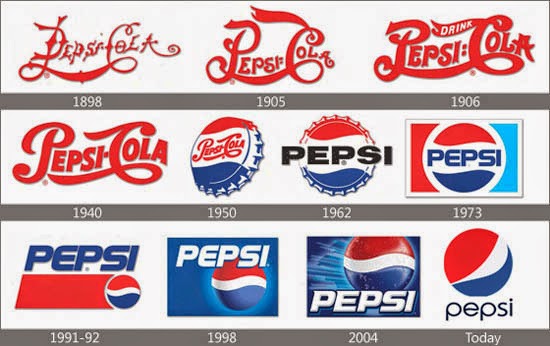
After looking at the color theory information and completing the worksheet, you will begin creating logos for your soda cans. Before you begin that here are a few examples of logos and a LINK to a website about logo evolution for you to look at.
As you create your logos for your soda cans, keep in mind that artists try and incorporate an image and text into one, easy to read, interesting design. Here is one more LINK to an article showing 50 different logos that contain a hidden meaning.
Soda Can Designs
Each can must contain a different name and logo design.
Each can must use a different color scheme. Label each can with the appropriate color scheme.
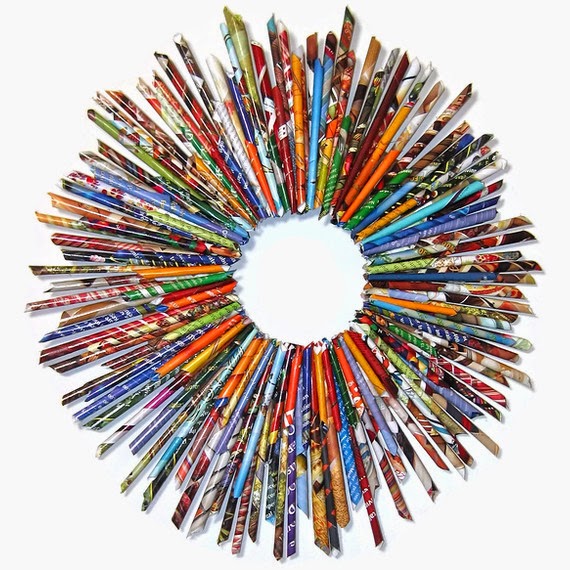
For our next project you will be using magazines and colored paper to create a sculpture of your choice. Your sculpture can be a relief sculpture, for hanging on a wall, or a sculpture in the round that stands on its own.
The pictures below are all examples of different magazine sculptures. They all look different but are all basically made the same way. Roll the magazine strips into tubes and glue them into an interesting pattern. Notice how the texture of the paper rolls create a nice pattern and rhythm in your work.
For this project you will be creating a color wheel using paint and using ONLY the primary colors. The primary colors are RED, BLUE, and YELLOW.
HERE is an amazing link on color theory that has all kinds of interesting facts about color through the eyes of science and art.
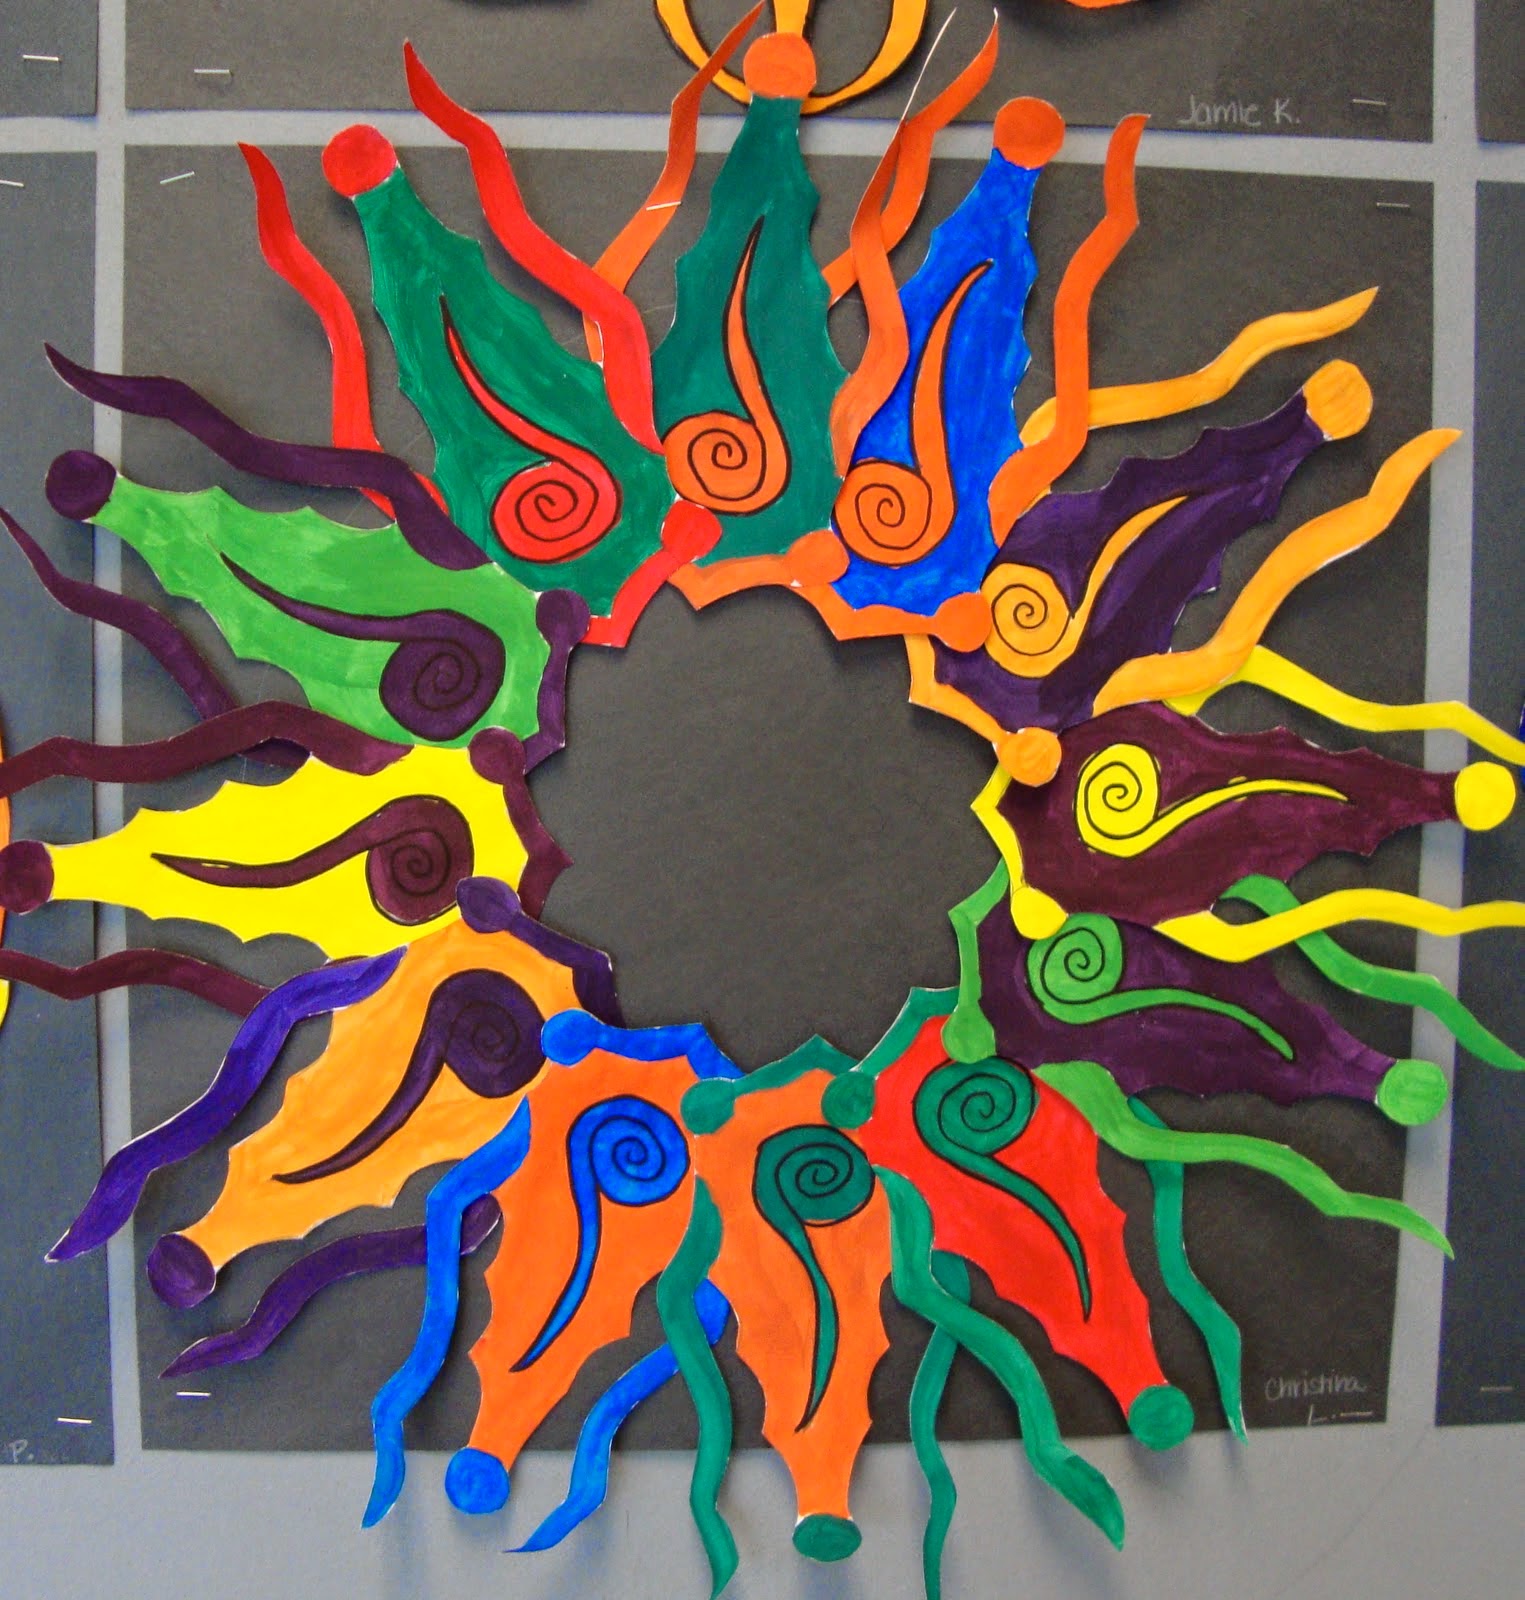
Here is my favorite example of a color wheel..........
....and here is a normal color wheel. Notice that even though they are very different, they do share some similarities.
Take a look at the website HERE to check out the project details.
Day 1- Brainstorm
Following the steps listed on the website above, we will BRAINSTORM today.
You will need to trace a slice of your circle three times on a plain sheet of paper.
Create three different design ideas in each of the three sections.
Think about how you can change the shape of the triangle to create something unique.
Day 2-7 Color Wheel
After discussing which design to use, you will begin making your circle.
Using the transfer technique discussed in class, transfer your image 12 times so you have 12 copies. These will be used for each section of the color wheel.
Paint each of your images a different color from the color wheel using only red, blue, and yellow. Follow the video below to help you complete your painting.
After you have painted all twelve pieces, you will place them on a black piece of paper in a circular pattern or in a line, in the correct order.
This is a project dealing with two elements, color and value. We will discuss both of these as we work through creating your abstract pieces, both traditionally and digitally.
COLOR
VALUE
MONOCHROMATIC VALUE SCALE
Day 1,2 - Value and Color Theory Worksheet
After watching the videos above, complete the worksheet. You will use a pencil to fill in your worksheet.
Day 3-5 Traditional Painting
During the next few days you will create your artworks. You have a few choices with this project so you can decide the design you would like to create. Here are some examples below.
All 3 projects share something similar, they are all monochromatic pieces. You may choose what type of painting and what color you will use.
Your piece must be a monochromatic piece and must contain at least 5 value steps.
This video discusses tints and shades, and will also show you how to mix color to create different values.
Day 5-6 Digital Painting
Students will be using Pixlr to create their digital paintings.
Day 7 Compare/ Contrast Essay
Fill out the venn diagram and then write a 3 paragraph compare and contrast essay.
HERE is a link that may help you write your essay.
During this unit we will be reviewing the Elements of Art and Principles of Design. The elements and principles are important to help you understand how to create and discuss artworks in class.
Day 1- Research and Define Elements and Principles/ Brainstorming
The elements of art are the building blocks used by artists to create a work of art.
Elements are the things that make up a painting, drawing, design...
• Line is a dot that goes on a walk. Lines can organize, direct or separate. They can join elements or divide them. They can create shapes, be expressive, suggest an emotion, or create a rhythm.
• Shape is a two- dimensional, self contained defined area of geometric or organic form. The three basic shapes: the circle, the square, and the triangle are considered to be the fundamental shapes found in all design.
• Color is the part of light that is reflected by the object we see. In 2D we mix pigments to create new colors. Color is defined by hue and value and intensity.
• Value is the lightness or darkness of an area or object. It adds dimension by creating the illusion of depth.
• Space refers to the distance between elements that creates positive or negative spaces in a composition.
• Texture is the look and feel of a surface (rough, smooth, soft, hard, glossy, etc) and it can be physical (realistic) or visual (implied). Texture adds richness and dimension to 2D works
• Forms are 3-d shapes, such as pyramids and cubes.
Principles are what we do with these elements • Balance occurs when all the design elements are equally distributed through the design. There are essentially three types of balance: symmetrical, asymmetrical, and radial.
• Contrast (Variety) stresses the visual differences in size, shape, and color between the elements to enhance the perception of a message intended. Contrast also draws and directs the viewer's attention to specific areas.
• Emphasis indicates the most important element because it attracts the viewer's attention first and creates a focal point.
• Rhythm is a pattern created by repeating elements. Rhythm also denotes the sequence to the viewing order.
• Proportion (Scale) can attract in different ways. It can be use to draw attention to the unexpected or exaggerated. Overall size, monumental pieces are impact full while miniature has a sense of intimacy. Scale, alone, can change the meaning.
• Unity is achieved when all the design elements relate to one another and project a sense of completeness. Artist and designers use the Gestalt Theory, the psychological process of perception, to create unity (also called harmony).
These are the Elements of Art and Principles of Design defined by The Getty Museum.
You will use these worksheets to complete your brainstorming exercise. Create drawings in each box that represent the element or principle given.
Day 2- Day 8 - Elements and Principles of Design Accordion Book /Stencils
The rest of this week will be spent on creating an accordion style book that contains a visual representation of the elements of art and principles of design. You will also be creating a stencil to use to help create your illustrations in your book. A stencil is a thin sheet of cardboard, plastic, or metal with a pattern or letters cut out of it, used to produce the cut design on the surface below by the application of ink or paint through the holes.
Here are some examples of finished accordion book projects. One side of the book contains elements, the other side contains principles. You will use the elements and principles from your brainstorming worksheet in your piece.
Directions
1. Measure 4 inch spaces around all 4 edges of your paper. Then connect the lines. Your paper should look like this.
2. Cut your paper/ Throw away the small piece on the end.
3. Using one of your sections, create 4 different stencil design ideas.
The other two sections will create your accordion book.
4. Choose your favorite stencil idea and cut it out.
Trace your stencil in each box of your other two paper sections.
Trace the image on BOTH sides. In the end you should have traced your stencil 16 times.
During this unit we will be reviewing the Elements of Art and Principles of Design. The elements and principles are important to help you understand how to create and discuss artworks in class.
Day 1- Research and Define Elements and Principles/ Socrative Quiz/ Brainstorming
The elements of art are the building blocks used by artists to create a work of art.
Elements are the things that make up a painting, drawing, design...
• Line is a dot that goes on a walk. Lines can organize, direct or separate. They can join elements or divide them. They can create shapes, be expressive, suggest an emotion, or create a rhythm.
• Shape is a two- dimensional, self contained defined area of geometric or organic form. The three basic shapes: the circle, the square, and the triangle are considered to be the fundamental shapes found in all design.
• Color is the part of light that is reflected by the object we see. In 2D we mix pigments to create new colors. Color is defined by hue and value and intensity.
• Value is the lightness or darkness of an area or object. It adds dimension by creating the illusion of depth.
• Space refers to the distance between elements that creates positive or negative spaces in a composition.
• Texture is the look and feel of a surface (rough, smooth, soft, hard, glossy, etc) and it can be physical (realistic) or visual (implied). Texture adds richness and dimension to 2D works
• Forms are 3-d shapes, such as pyramids and cubes.
Principles are what we do with these elements
• Balance occurs when all the design elements are equally distributed through the design. There are essentially three types of balance: symmetrical, asymmetrical, and radial.
• Contrast (Variety) stresses the visual differences in size, shape, and color between the elements to enhance the perception of a message intended. Contrast also draws and directs the viewer's attention to specific areas.
• Emphasis indicates the most important element because it attracts the viewer's attention first and creates a focal point.
• Rhythm is a pattern created by repeating elements. Rhythm also denotes the sequence to the viewing order.
• Proportion (Scale) can attract in different ways. It can be use to draw attention to the unexpected or exaggerated. Overall size, monumental pieces are impact full while miniature has a sense of intimacy. Scale, alone, can change the meaning.
• Unity is achieved when all the design elements relate to one another and project a sense of completeness. Artist and designers use the Gestalt Theory, the psychological process of perception, to create unity (also called harmony).
These are the Elements of Art and Principles of Design defined by The Getty Museum.
You will use these worksheets to complete your brainstorming exercise. Create drawings in each box that represent the element or principle given.
Day 2-Day 5- Elements and Principles of Design Cubes
For the rest of the week we will be working on creating cubes that have illustrations of the elements and principles of design. After you finish your cubes, they will be hung from the art room ceiling as a collaborative installation piece.
You will use this worksheet to create your cube designs. Each side of the cube will represent a different element or principle. You will make 2 cubes an elements cube and a principles cube.
Use your brainstorm worksheets to help you create your cube designs.
You may notice that there are 7 elements and only 6 sides on a cube. You WILL NOT create a design for form, because you are already representing that by making a cube.




.jpg)