Classes

Showing posts with label Art History. Show all posts

6th- Giuseppe Archimboldo "Creating Portraits from Objects"


During the Renaissance one artist was centuries beyond his time--Giuseppe Arcimboldo. While the Great Masters such as Michelangelo and Raphael focused on rendering human figures realistically, Giuseppe Arcimboldo created surreal portraits of his subjects made of vegetables, plants, fruits, sea creatures, tree roots, and books. In this class we will create our own paintings mimicking Arcimboldo’s unique style using fruits and vegetables.


Giuseppe Arcimboldo (also spelled Arcimboldi; 1527 - July 11, 1593) was an Italian painter best known for creating imaginative portrait heads made entirely of such objects as fruits, vegetables, flowers, fish, and books - that is, he painted representations of these objects on the canvas arranged in such a way that the whole collection of objects formed a recognizable likeness of the portrait subject.

Arcimboldo was born in Milan in 1527, the son of Biagio, a painter who did work for the office of the Fabbrica in the Duomo. Arcimboldo was commissioned to do stained glass window designs beginning in 1549, including the Stories of St. Catherine of Alexandria vitrage at the Duomo. In 1556 he worked with Giuseppe Meda on frescoes for the Cathedral of Monza. In 1558, he drew the cartoon for a large tapestry of the Dormition of the Virgin Mary, which still hangs in the Como Cathedral today.


CLICK THIS LINK TO VIEW ARCIMBOLDO'S COMPLETE WORKS -> 

CLICK THIS LINK TO VIEW SOME NEAT SCULPTURES INSPIRED BY ARCIMBOLDO ->

UNITY - A principle of art, unity occurs when all of the elements of a piece combine to make a balanced, harmonious, complete whole. Unity is another of those hard-to-describe art terms but, when it's present, your eye and brain are pleased to see it.

VARIETY - A principle of art concerned with combining one or more elements of art in different ways to create interest.

How does Arcimboldo create unity in his artworks?

How does Arcimboldo create variety in his artworks?

How will your create texture on your items to make them look realistic?


YOUR PROJECT is to create a portrait of a person using vegetables, fruits, or other objects  to make the person's face. 
You may use any items you would like to make your person. Like Arcimboldo, your items should all relate to each other to create a theme for your portrait.


AR Standards: CR1.6.2 CR2.6.1 R7.6.1 R8.6.1 CN11.6.1

6th Grade- Henna Hand Zentangles

Our first project will take us halfway around the world to an ancient tradition practiced for over 5000 years. You will create a henna design on a hand using the zentangle method and then color your design using crayons or colored pencils. Zentangles and henna designs will create awesome patterns and textures in your artwork.

Check out this link about henna --> http://www.art-is-fun.com/henna-hand-designs
Here are two links on zentangles --> https://www.zentangle.com/   http://tanglepatterns.com/


Origin of Henna

Origin of Henna
The art of henna (called mehndi in Hindi & Urdu) has been practiced for over  5000 years in Pakistan, India, Africa and the Middle East. There is some documentation that it is over 9000 years old.  Because henna has natural cooling properties, people of the desert, for centuries, have been using henna to cool down their bodies.  They make a paste of henna and soak their palms and soles of the feet in it to get an air conditioning affect.  They feel its cooling sensation throughout the body for as long as the henna stain remains on their skin.  Initially, as the stain faded away, it left patterns on the skin surface which led to ideas to make designs for decorative purposes.  In the ancient Egyptian times mummies wore henna designs and it is documented that Cleopatra herself used henna for decorative purposes.
Henna was not only a popular adornment for the rich but the poor, who could not afford jewelry, used it to decorate their bodies as well.

Henna in the West

Today people all over the world have adopted the ancient traditions of adorning their bodies with the beautiful natural artwork created from the henna plant.  It became a very popular form of temporary body decoration  in the 90's in the US and has become a growing trend ever since.  Celebrities like Madonna, Gwen Stefani, Yasmine Bleeth, Liv Tyler, Xena, and many others proudly adorn their bodies with henna and show them off in public, movies, videos, etc. People throughout the west have adopted the eastern tradition in their lives by having their hands and feet painted for weddings, bellies painted while in pregnancy, heads adorned with henna while going through chemotherapy, scars camouflaged to make them unnoticeable, etc.


DIRECTIONS:


STEP 1: TRACE YOUR HAND, PUT YOUR HAND TOWARDS THE TOP OF THE PAGE SO YOU CAN HAVE SOME OF YOUR WRIST TO DRAW ON.

STEP 2: CHOOSE A TRADITIONAL OR ZENTANGLE STYLE HENNA HAND DESIGN.

STEP 3: CREATE YOUR DESIGN IN YOUR HAND. USE THE WEBSITES PROVIDED ABOVE TO HELP WITH YOUR DESIGNS.


ZENTANGLE HAND
TRADITIONAL HAND


AR Standards: CR2.6.1 R8.6.1 R9.6.1 CN10.6.1 

6th Grade- Modern Day Hieroglyphics/ Cartouche Translations


This project will take a look at Ancient Egyptian figure proportions. You will create a modern day person (clothing, hair style) with Ancient Egyptian proportions, OR you will create a cartouche of your name.


This video discusses Ancient Egyptian proportion.


PROJECT 1

Using the video above and the picture below as a reference, create a modern day person using Ancient Egyptian figure proportions. 


PROJECT 2
Cartouche


Follow The steps on the website to write your name in hieroglyphics. 

1. Draw your cartouche using the example in class. 
2. Fill the cartouche with color. 
3.  Write your name in hieroglyphics. Make the characters fill up the space in your cartouche
4. Color your hieroglyphic characters.


AR Standards: CR1.6.1 P4.6.1 P6.6.2 R7.6.2 CN10.6.1 


8th- Fractured Cubist Oil Pastel Drawings

Pablo Picasso, "Three Musicians"

During this project we will look at the cubist movement and Pablo Picasso. You will create a piece in the cubist style and color it using oil pastels.


Pablo Picasso was the most dominant and influential artist of the first half of the twentieth century. Associated most of all with pioneering Cubism, alongside Georges Braque, he also invented collage and made major contributions to Symbolism and Surrealism. He saw himself above all as a painter, yet his sculpture was greatly influential, and he also explored areas as diverse as printmaking and ceramics. Finally, he was a famously charismatic personality; his many relationships with women not only filtered into his art but also may have directed its course, and his behavior has come to embody that of the bohemian modern artist in the popular imagination.


Follow the steps below to create your piece:


All steps are listed here as well.

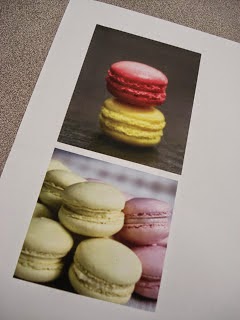
STEP 1: Choose your subject matter. This artist chose french macarons. Find an image to use as a reference for step 2.

 STEP 2: DRAW YOUR ITEM 3 TIMES Vary the sizes of the objects, but draw them fairly large. Just a simple contour drawing- no shading. Arrange them on the paper so there is a fairly equal balance between positive and negative space.


 STEP 3: OUTLINE WITH BLACK MARKER


 STEP 4: Next- cut the drawing apart into 3-5 puzzle-type sections.  
Use straight angle cuts, not wavy lines. 
Again, vary the sizes and shapes, but nothing too small. Outline all the edges with black marker.

STEP 5: Then, re-arrange the pieces into a new composition: a fragmented version of the original drawing.
For the final, take another piece of paper the same size as the original (about 12 x 18"), and carefully place it ON TOP of the cut pieces. Carefully trace, with a black marker, the entire composition including the edges of the cut paper. 


STEP 6: Finally, color in the design with oil pastels. 
Choose 3-4 colors for the objects and then 3-4 contrasting colors for the background. 
You should practice blending these colors together beforehand with your fingers. 
You should work on creating value changes and soft gradations which is a typical characteristic of the Analytical Cubist style.


FINISHED EXAMPLES:


8th-Mandalas and Radial Balance


The mandala is one of humankind's most ancient art forms. With the circle as its basis, it reflects eternity and all of nature: the sun, the moon and even the bird's nest. Types of mandalas may be found in all religions, as well as in psychology.

The word "mandala" is Sanskrit for "circle." According to mandala artist Charles Gilchrist, creator of "Sacred Geometry," a wandering guru may have brought the first meditation mandalas to Tibet in about the eighth century. Mandalas have been found across the Far East, and Native Americans symbolism is based on the "sacred hoop." Mandalas are considered to be of Eastern origin, but it would be difficult, if not impossible, to find any civilization without some awareness of the circle's symbolism and potential for spiritual self-examination.


Mandala History
Mandala History 2


For this project, you will create two mandalas. One on the iPad, using procreate and one physical mandala using paper, pencil, and colored pencils.


DIRECTIONS:

Use the video below for step by step instructions on making your physical mandala. 


For the digital artwork, you will use procreate on the iPad.

To set up your drawing in Procreate
1. Click the plus sign for a new piece and choose square.
2. Click the wrench icon and turn on Drawing Guide
3. Click, Edit Drawing Guide
4. Click Symmetry, Radial, and Assisted Drawing
5. For a square mandala you are ready to go.
6. For a circle mandala turn on Rotational Symmetry. 


5th- BAM! Onomatopoeia and Roy Lichtenstein


For our next project we will take a look at onomatopoeia, a fun literary component that you are learning about in your English classes. We will also take a look at Pop Art and Roy Lichtenstein. You will create a mixed media collage using newspaper, markers, and construction paper. 

onomatopoeia: (n) the formation of a word, as cuckoo, meow, honk, or boom, by imitation of a sound made by or associated with its referent.


Roy Lichtenstein

Blam is a 1962 painting by Roy Lichtenstein described by critics as pop art. It is one of his military comic book derivatives and was one of the works presented at his first solo exhibition.

As I Opened Fire is a 1964 oil and magna on canvas painting by Roy Lichtenstein. The work is hosted at the Stedelijk Museum in Amsterdam.

Whaam! is a 1963 diptych painting by the American artist Roy Lichtenstein. It is one of the best-known works of pop art, and among Lichtenstein's most important paintings. 


Create your Onomatopoeia


Step 1: Choose your word and draw it in bubble or block letters. 


Step 2: Cut it out. 


Step 3: Cover a piece of computer paper with pieces of newspaper.


Step 4: Cut desired shape out of your construction paper. 


Step 5: Cut out any extra shapes you may want.


Step 6: Glue your pieces together 
(Bottom to Top- Newspaper, Construction Paper, Onomatopoeia, Extra Shapes) 


AR Standards: CR1.5.1 CR1.5.2 CR2.5.1 CR2.5.2 P6.5.2 R7.5.1 CN11.5.1