If you think that being your own boss, running your own company, and earning your own way are great ideas, then this project is for you! More than 23 million Americans own small businesses. About 800,000 new businesses are opened each year.
There were over 30,000 food truck business in the United States as of 2023.
A food truck is a large vehicle with a kitchen to make and serve food. They are popping up across the United States and are becoming increasingly popular. Many entrepreneurs opt for a food truck because purchasing a restaurant location is very expensive, while food trucks are much more affordable.
Click the link here to read about food trucks and answer the worksheet provided.
.jpeg)


Day 1-2


Click this link to read the article and answer the questions.
Complete the worksheet today and then answer the brainstorming questions.
BRAINSTORM
1. Favorite Food
2. Clever Food Truck Name
3. Color Scheme
4. Slogan
5. Start sketching images and fonts for your logo that you think will represent your food truck well.
Day 3-4
LOGO/SLOGAN
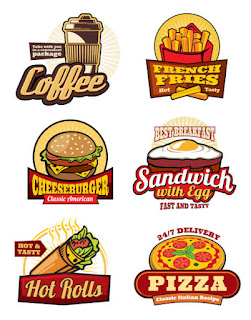
Examples:

1. Design a logo for your food truck. This symbol must represent your business effectively and give your customers a visual
representation of your food truck business.
Design it carefully because it will appear on most of your company’s literature.
2. Write a short slogan that will be used to represent and advertise your business. It should not be more than six or seven words.
Think of logos that companies use, such as the Nike swoosh sign, the Ford logo, or the Apple computer logo. Why did these companies choose these kinds of logos? How do they represent their businesses most effectively? The logo should
be colorful and creative, but not necessarily complex.
Keep it simple, crisp and catchy. Presentation is everything!
Think about popular business slogans used by companies today. For example, Nike uses
the slogan “Just do it.” Volkswagen’s slogan is “Drivers wanted.” A slogan is a catchy
phrase used by a company to help consumers or customers remember their business. The
shorter the slogan is, the better, because it will be easier to remember.
Here are some great links to check out as you brainstorm your ideas.
Day 6-9
Food Truck
Our final part of the project will be to create your food truck sculpture. You will be given a template to use for your food truck. You will design the truck using your logo, color scheme, and slogan to create an interesting design for your truck. We will be using prismacolor colored pencils for this project so you can work on blending colors together to create an interesting food truck.
Take a look at the video below for an example.


Your food truck must include:
-your business name and logo on 1 side of the truck
-your business name and logo on top of the truck
-a color scheme that relates to your logo
-a service window
-a design around your window that showcases ingredients or the theme of your truck
-a business logo or design on the back door that incorporates ingredients or theme

Day 10-12
Menu


It may seem like a small part of your overall food truck business, but the food truck menu board can have a big impact on how successful your food truck really is. It doesn’t matter how delicious your food is if you can’t attract the customers over in the first place.
Your food truck menu must include:
-your business name, logo, and slogan
-a font that relates to your logo or theme
-same color scheme as your truck and logo
-a border around the edge of your menu that relates to your theme
-at least 6 menu items with photos and small descriptions

8th AR Standards: CR1.8.1 CR1.8.2 CR1.8.3 CR3.8.1 P5.8.1 CN10.8.1

.png)


