ARTimus Prime is your destination to check out all the projects going on at the Fountain Lake Cobra Digital Prep Academy. Bookmark this page to check back here all year to see what we are doing in the Art Room and to keep up with all of your assignments.
This project is based on drawing from observation or drawing from life. You will use your hand as a reference for all of the hand drawings that you create.
Comic book covers have served as dynamic windows into storytelling since their inception in the 1930s. These eye-catching illustrations have transformed from simple character portraits to complex artistic masterpieces that capture readers' imaginations. The Golden Age of Comics (1938-1956) introduced iconic superheroes like Superman and Batman with bold, action-packed covers featuring bright primary colors. As printing technology advanced through the Silver Age (1956-1970) and beyond, covers became more sophisticated, incorporating detailed artwork, dramatic perspectives, and innovative design elements. Today, comic book covers continue to evolve, combining traditional illustration techniques with digital artistry to create compelling visual narratives that draw readers into their worlds.
For our next project, students will create an original comic book cover featuring a unique character, incorporating elements like a title, subtitle, publisher logo, and a well-structured visual design.
Key Vocabulary:
Foreground: The part of the image that appears closest to the viewer.
Middle ground: The area between the foreground and background in a visual composition.
Background: The part of the image that appears farthest away from the viewer.
Overlapping: When one object covers part of another, creating a sense of depth.
Publisher: A company or organization that produces and distributes books or comics.
Intro:
Today we will take a look at a video from the Art Ed Guru. He is the creator of this project and you can find many student examples of this project on his website listed below.
As you watch the video- think about these questions:
What makes a comic book cover eye-catching?
Can you think of any comic book characters that inspire you?
What elements do you notice on your favorite comic book covers?
After watching the video, begin to brainstorm your character and comic book details.
How will you design the character for your comic book cover?
What story does your title and subtitle suggest?
How will you arrange the foreground, middle ground, and background to make your cover visually appealing?
Who is your publisher?
Remember your cover must include all of these items:
Publisher Logo, Title, Subtitle
and your artwork should include a foreground, middle ground, background, and overlapping.
After brainstorming your idea and sketching an idea you will be given a piece of paper that is 10.5x6.75. This is the basic size of a comic book cover.
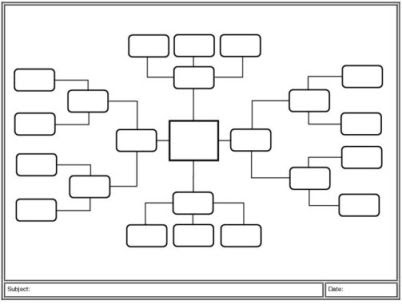
1. Create a mind map for your doodle project. Begin with your theme in the middle and make bubbles that expand from that with different ideas for your theme.
A mind map is a diagram used to visually organize information into a hierarchy, showing relationships among pieces of the whole.[1] It is often created around a single concept, drawn as an image in the center of a blank page, to which associated representations of ideas such as images, words and parts of words are added. Major ideas are connected directly to the central concept, and other ideas branch out from those major ideas.
2. Begin sketching doodle ideas for your final piece in your sketchbook or on a piece of loose paper. You may use the site https://thenounproject.com/ to help you with references for symbols.
This project is brought to you by THAT ART TEACHER, she has a super awesome blog too! You should check it out sometime!
Tate defines modular as “a term used particularly in relation to minimalism, referring to a work of art with constituent parts that can be moved, separated and recombined.”
During the 1960s artists began creating simple sculptures made from industrial materials like sheet metal, plywood and bricks. In order to distance themselves from traditional sculpture, minimalist artists would describe these artworks in very literal ways, calling them ‘specific objects’ or ‘modules’.
The term modular is closely associated with the artist Sol LeWitt who, in 1965, began working on a series of open and closed cubes, like building blocks, which could be ordered and inter-locked in various different combinations in accordance with a pre-determined system.
Camilla Løw is another artist that connects to minimalism and geometric shapes. She creates fun sculptures that are great examples of non-objective art. See examples of her work here.
Directions:
MAKING MODULES
Remember, Tate defines modular as “a term used particularly in relation to minimalism, referring to a work of art with constituent parts that can be moved, separated and recombined.”
1. You and your partner need to decide on a shape and make as many as you can with the popsicle sticks provided. Be creative and think of all the different shapes you could make before deciding. You can use Elmer's glue for this step.
2. After all of your modules have been constructed, you and your partner will choose a color to paint them. Paint all of your modules the same color.
3. Using your cardboard base as a starting point, begin arranging your modules to create an interesting abstract form with your shapes. Use hot glue to put the modules together. You're sculpture needs to be balanced and stand on its own.
(Remember, your sculpture will be painted a single color at this point)
4. After you finish assembling your sculpture, you will be able to add another color to your sculpture by splattering paint onto it.
5. Let your sculpture dry and submit your sculpture to Artsonia.
You should submit two photos of your sculpture from different angles for full credit.
If you think that being your own boss, running your own company, and earning your own way are great ideas, then this project is for you! More than 23 million Americans own small businesses. About 800,000 new businesses are opened each year.
There were over 30,000 food truck business in the United States as of 2023.
A food truck is a large vehicle with a kitchen to make and serve food. They are popping up across the United States and are becoming increasingly popular. Many entrepreneurs opt for a food truck because purchasing a restaurant location is very expensive, while food trucks are much more affordable.
Click the link here to read about food trucks and answer the worksheet provided.
Day 1-2
Click this link to read the article and answer the questions.
Complete the worksheet today and then answer the brainstorming questions.
BRAINSTORM
1. Favorite Food
2. Clever Food Truck Name
3. Color Scheme
4. Slogan
5. Start sketching images and fonts for your logo that you think will represent your food truck well.
Day 3-4
LOGO/SLOGAN
Examples:
1. Design a logo for your food truck. This symbol must represent your business effectively and give your customers a visual
representation of your food truck business.
Design it carefully because it will appear on most of your company’s literature.
2. Write a short slogan that will be used to represent and advertise your business. It should not be more than six or seven words.
Think of logos that companies use, such as the Nike swoosh sign, the Ford logo, or the Apple computer logo. Why did these companies choose these kinds of logos? How do they represent their businesses most effectively? The logo should
be colorful and creative, but not necessarily complex.
Keep it simple, crisp and catchy. Presentation is everything!
Think about popular business slogans used by companies today. For example, Nike uses
the slogan “Just do it.” Volkswagen’s slogan is “Drivers wanted.” A slogan is a catchy
phrase used by a company to help consumers or customers remember their business. The
shorter the slogan is, the better, because it will be easier to remember.
Here are some great links to check out as you brainstorm your ideas.
Our final part of the project will be to create your food truck sculpture. You will be given a template to use for your food truck. You will design the truck using your logo, color scheme, and slogan to create an interesting design for your truck. We will be using prismacolor colored pencils for this project so you can work on blending colors together to create an interesting food truck.
Take a look at the video below for an example.
Your food truck must include:
-your business name and logo on 1 side of the truck
-your business name and logo on top of the truck
-a color scheme that relates to your logo
-a service window
-a design around your window that showcases ingredients or the theme of your truck
-a business logo or design on the back door that incorporates ingredients or theme
Day 10-12
Menu
For the final part of our project, you will create your food truck menu, using Photopea.
It may seem like a small part of your overall food truck business, but the food truck menu board can have a big impact on how successful your food truck really is. It doesn’t matter how delicious your food is if you can’t attract the customers over in the first place.
Check out the link below for examples of food menus:
During this lesson, we will take a look at graphic design, basic color theory and different color schemes used in art.
After completing a color theory worksheet you will create four unique soda can designs. Each can must include a different color scheme,different logo, design, and original name. We will also take a look at the graphic design process and discuss logos in society.
For now take a look at the websites below to get some inspiration and instruction in color theory and graphic design.
HERE is a site on basic color theory that lists some color schemes.
Here is a video that will explain all ten color schemes that are discussed in class and on your worksheet.
Day 1- Color Theory Intro
Compelete the worksheet on color theory.
Day 2-4 Soda Can Logo Designs
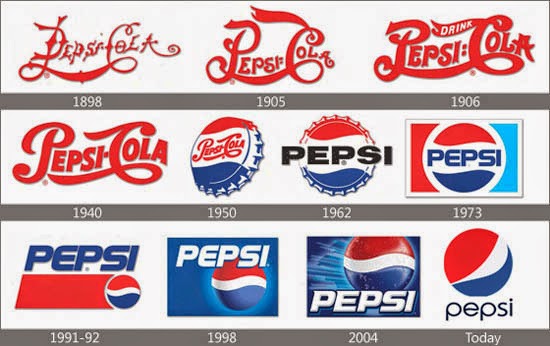
After looking at the color theory information and completing the worksheet, you will begin creating logos for your soda cans. Before you begin that here are a few examples of logos and a LINK to a website about logo evolution for you to look at.
As you create your logos for your soda cans, keep in mind that artists try and incorporate an image and text into one, easy to read, interesting design. Here is one more LINK to an article showing 50 different logos that contain a hidden meaning.
Soda Can Designs
Each can must contain a different name and logo design.
Each can must use a different color scheme. Label each can with the appropriate color scheme.
This art project is brought to you by That Art Teacher. Click on their name to bring up the link and some videos and examples.
This project will take a look at the surrealism art movement and dada art movement. We will look at artist Hannah Hoch for inspiration for our collage. You will create your collages on Photopea and use remove.bg to help you remove backgrounds from images.
For our next project, you will take on the role of a cartographer. Cartography, at its core, is the art and science of creating and using maps to represent the physical world.
Take a look at this link to find out more about cartography:
The first part of our project will use a website called Inkarnate to create a fantasy map.
There are two free options on Inkarnate to create a map. You can use either choice to create your map. We will learn about and add a fantasy compass rose to this map in Photopea on Day 3.
Today we will add a compass rose to your digital map.
Your compass rose must include
1. A fantasy creature/object
2. Compass
3. Scroll with your world name
You will need to find these images online and use remove.bg or photopea to remove the background images.
You will open your map in photopea and add your compass rose to the map by using
File>Open and Place to place your items
and
Edit>Free Transform to resize and move your images
DAY 4-9 Hand-Drawn Map
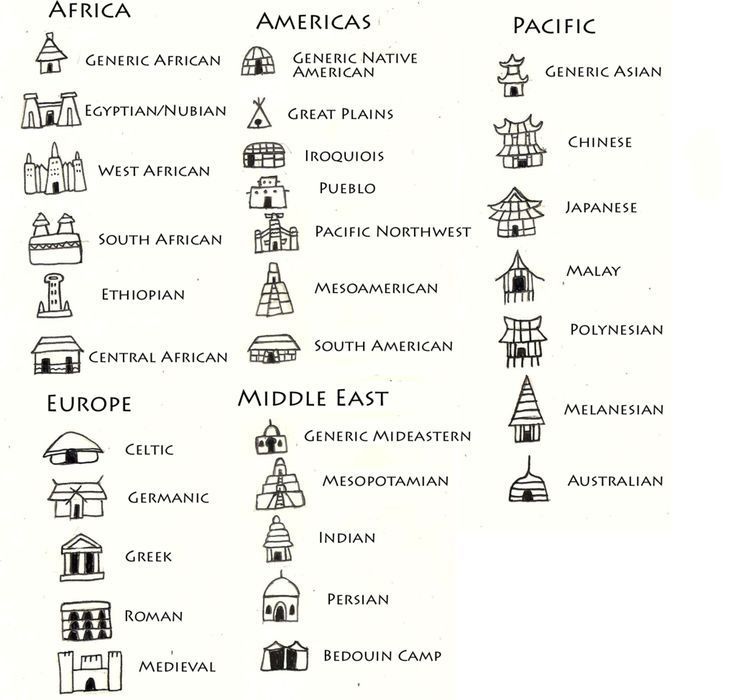
On day 4 we will begin practicing drawing different landmasses and transitioning into the hand drawn map portion of the project by building your world, let's look at this skillshare and talk a little about building your fantasy world.
After that you will be able to begin your map drawing. We will use micron pens to outline your artwork. After you finish your drawing, we will age your paper by painting a brown watercolor wash over your map. You may also tear and wrinkle your map along the edges to create even more of an old map feel.
Here are some links for inspiration and some step by step map making:


.png)


.jpeg)


.jpeg)




.png)
.jpg)
%20(1).jpg)



.jpeg)

