Classes

6th- Digital Mosaics in Google Drawings

 Our next project will take a look at the art of mosaics and stained glass. Mosaics have a long history, starting in Mesopotamia in the 3rd millennium BC. They were typically made from clay tiles, pebbles and sometimes glass. They often depicted religious subjects or were purely decorative. You will be able to choose any photo you would like to create for your mosaic and we will discuss how to use the Google Drawing tools in class. Take a look at the links below for inspiration and some of my examples in the photos.


https://www.artsyshark.com/2019/11/18/featured-artist-carol-davis/

https://www.mountainliving.com/hand-cut-stained-glass-mosaics/

https://jkmosaic.com/translucent-stained-glass-mosaic/


DIRECTIONS:

Find an image to recreate as a mosaic and save it.
Upload your photo into Google Drawings.
Using the tools we discuss in class, create your mosaic. 


5th- Zentangles

This lesson will focus on using lines to create different patterns and textures.
We will look at a cool method of drawing called Zentangling, which is a fun, easy way to make some intricate looking artworks.


"The Zentangle Method is an easy-to-learn, relaxing, and fun way to create beautiful images by drawing structured patterns."
"Almost anyone can use it to create beautiful images. It increases focus and creativity, provides artistic satisfaction along with an increased sense of personal well being. The Zentangle Method is enjoyed all over this world across a wide range of skills, interests and ages."
This is the official Zentangle website


This site has many step by step instructions to help you make your zentangle patterns.
USE THIS SITE FOR ALL OF YOUR PATTERNS!!

We will go over how to use the site in class but here are some basic instructions for the website. 

Look through the list of patterns by clicking on the letters of the alphabet at the top of the screen. All the patterns are in alphabetical order. 
Look the pink links in the How to Draw sections for instructions on each pattern, or just scroll down on the page to see instructions. 

PROJECT DIRECTIONS:
Create your own zentangle drawing using at least 5 different patterns in your artwork. 
FILL THE ENTIRE PAGE!
Follow the simple instructions from the website to make 
intricate patterns and designs in your zentangle. 
Share your favorite design ideas with your classmates! 
How does your pattern compare to the original?
How did you change it to make it your own?
Did you fill the entire page?


AR Standards: CR1.5.1 CR2.5.1 P6.5.2 R7.5.1

6th Grade- Henna Hand Zentangles

Our first project will take us halfway around the world to an ancient tradition practiced for over 5000 years. You will create a henna design on a hand using the zentangle method and then color your design using crayons or colored pencils. Zentangles and henna designs will create awesome patterns and textures in your artwork.

Check out this link about henna --> http://www.art-is-fun.com/henna-hand-designs
Here are two links on zentangles --> https://www.zentangle.com/   http://tanglepatterns.com/


Origin of Henna

Origin of Henna
The art of henna (called mehndi in Hindi & Urdu) has been practiced for over  5000 years in Pakistan, India, Africa and the Middle East. There is some documentation that it is over 9000 years old.  Because henna has natural cooling properties, people of the desert, for centuries, have been using henna to cool down their bodies.  They make a paste of henna and soak their palms and soles of the feet in it to get an air conditioning affect.  They feel its cooling sensation throughout the body for as long as the henna stain remains on their skin.  Initially, as the stain faded away, it left patterns on the skin surface which led to ideas to make designs for decorative purposes.  In the ancient Egyptian times mummies wore henna designs and it is documented that Cleopatra herself used henna for decorative purposes.
Henna was not only a popular adornment for the rich but the poor, who could not afford jewelry, used it to decorate their bodies as well.

Henna in the West

Today people all over the world have adopted the ancient traditions of adorning their bodies with the beautiful natural artwork created from the henna plant.  It became a very popular form of temporary body decoration  in the 90's in the US and has become a growing trend ever since.  Celebrities like Madonna, Gwen Stefani, Yasmine Bleeth, Liv Tyler, Xena, and many others proudly adorn their bodies with henna and show them off in public, movies, videos, etc. People throughout the west have adopted the eastern tradition in their lives by having their hands and feet painted for weddings, bellies painted while in pregnancy, heads adorned with henna while going through chemotherapy, scars camouflaged to make them unnoticeable, etc.


DIRECTIONS:


STEP 1: TRACE YOUR HAND, PUT YOUR HAND TOWARDS THE TOP OF THE PAGE SO YOU CAN HAVE SOME OF YOUR WRIST TO DRAW ON.

STEP 2: CHOOSE A TRADITIONAL OR ZENTANGLE STYLE HENNA HAND DESIGN.

STEP 3: CREATE YOUR DESIGN IN YOUR HAND. USE THE WEBSITES PROVIDED ABOVE TO HELP WITH YOUR DESIGNS.


ZENTANGLE HAND
TRADITIONAL HAND


AR Standards: CR2.6.1 R8.6.1 R9.6.1 CN10.6.1 

5th- One Point Perspective


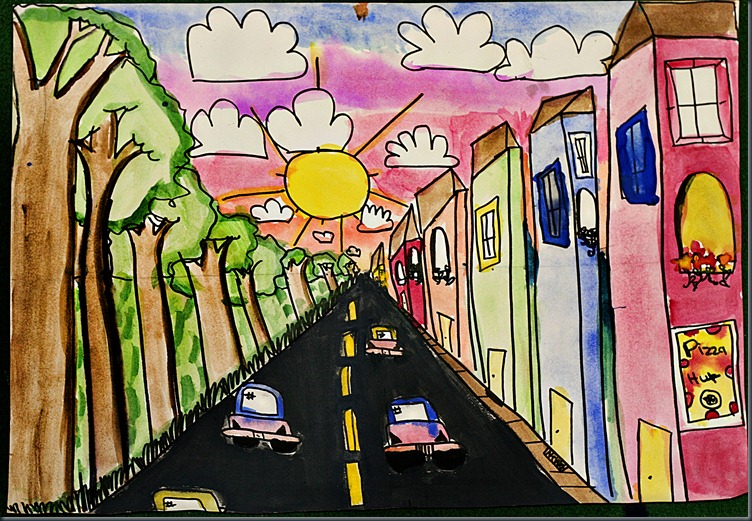
One point perspective is a drawing method that shows how things appear to get smaller as they get further away, converging towards a single 'vanishing point' on the horizon line. It is a way of drawing objects upon a flat piece of paper (or other drawing surface) so that they look three-dimensional and realistic.

Drawing in one point perspective is usually appropriate when the subject is viewed ‘front-on’ (such as when looking directly at the face of a cube or the wall of building) or when looking directly down something long, like a road or railway track. It is popular drawing method with architects and illustrators, especially when drawing room interiors.


Activity:

Today you will begin creating a drawing in one point perspective.
Use the steps from the website below to help you create your one point perspective drawing.
After you finish the steps in the tutorial, be creative and finish your drawing how ever you would like.
Color your piece and turn into Artsonia.


This is the basic drawing


After you complete the basic drawing, finish it in a colorful, creative way.


8th- Doodles


Keith Haring


Mr Doodle


Doodle Boy 

Links about doodling and choosing a topic


DIRECTIONS:


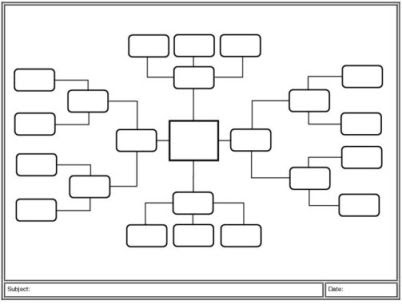
1. Create a mind map for your doodle project. Begin with your theme in the middle and make bubbles that expand from that with different ideas for your theme. 
A mind map is a diagram used to visually organize information into a hierarchy, showing relationships among pieces of the whole.[1] It is often created around a single concept, drawn as an image in the center of a blank page, to which associated representations of ideas such as images, words and parts of words are added. Major ideas are connected directly to the central concept, and other ideas branch out from those major ideas.


2. Begin sketching doodle ideas for your final piece in your sketchbook or on a piece of loose paper. You may use the site https://thenounproject.com/ to help you with references for symbols. 

3. Final Drawing (Starting next week)


8th- Modular Sculptures


This project is brought to you by THAT ART TEACHER, she has a super awesome blog too! You should check it out sometime!


 Tate defines modular as “a term used particularly in relation to minimalism, referring to a work of art with constituent parts that can be moved, separated and recombined.”

During the 1960s artists began creating simple sculptures made from industrial materials like sheet metal, plywood and bricks. In order to distance themselves from traditional sculpture, minimalist artists would describe these artworks in very literal ways, calling them ‘specific objects’ or ‘modules’.

The term modular is closely associated with the artist Sol LeWitt who, in 1965, began working on a series of open and closed cubes, like building blocks, which could be ordered and inter-locked in various different combinations in accordance with a pre-determined system.


Rasheed Araeen is a great artist to study minimalism, geometric shapes and modular art.  You can read about his work here on the Tate Museum website.


Camilla Løw is another artist that connects to minimalism and geometric shapes.  She creates fun sculptures that are great examples of non-objective art.  See examples of her work here.


Directions:

MAKING MODULES


Remember,  Tate defines modular as “a term used particularly in relation to minimalism, referring to a work of art with constituent parts that can be moved, separated and recombined.” 

1. You and your partner need to decide on a shape and make as many as you can with the popsicle sticks provided. Be creative and think of all the different shapes you could make before deciding. You can use Elmer's glue for this step. 

2. After all of your modules have been constructed, you and your partner will choose a color to paint them. Paint all of your modules the same color. 

3. Using your cardboard base as a starting point, begin arranging your modules to create an interesting abstract form with your shapes. Use hot glue to put the modules together. You're sculpture needs to be balanced and stand on its own. 

(Remember, your sculpture will be painted a single color at this point)

4. After you finish assembling your sculpture, you will be able to add another color to your sculpture by splattering paint onto it. 

5.  Let your sculpture dry and submit your sculpture to Artsonia.
You should submit two photos of your sculpture from different angles for full credit.
Your and your partner should both submit photos.