Create a scavenger hunt based on a theme of your choosing. You will use two apps(Aurasma and Green Screen by Do Ink) to create your clues in your scavenger hunt.
6th-Unity and Variety: A Zentangle Collaboration
This project takes a look at two principles of art unity and variety, by creating unique zentangle designs as a class.


1.Create a large circular/oval shape on your paper. Make it large and don't worry about it being perfectly round.
2.Next, using a pencil, fill your shape will zentangle patterns include at least 3 to 4 or more patterns in your circle/oval shape.
3.Outline your zentangle patterns using oil pastels or crayons.
AR Standards: CR1.6.1 CR2.6.1 CR2.6.2 P5.6.1 R8.6.1
8th- Fractured Cubist Oil Pastel Drawings

Pablo Picasso, "Three Musicians"
During this project we will look at the cubist movement and Pablo Picasso. You will create a piece in the cubist style and color it using oil pastels.

Pablo Picasso was the most dominant and influential artist of the first half of the twentieth century. Associated most of all with pioneering Cubism, alongside Georges Braque, he also invented collage and made major contributions to Symbolism and Surrealism. He saw himself above all as a painter, yet his sculpture was greatly influential, and he also explored areas as diverse as printmaking and ceramics. Finally, he was a famously charismatic personality; his many relationships with women not only filtered into his art but also may have directed its course, and his behavior has come to embody that of the bohemian modern artist in the popular imagination.
Follow the steps below to create your piece:
All steps are listed here as well.
STEP 1: Choose your subject matter. This artist chose french macarons. Find an image to use as a reference for step 2.
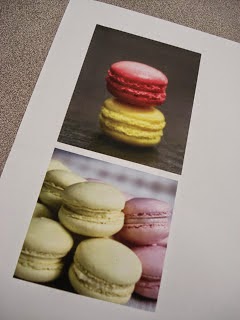 |
STEP 2: DRAW YOUR ITEM 3 TIMES Vary the sizes of the objects, but draw them fairly large. Just a simple contour drawing- no shading. Arrange them on the paper so there is a fairly equal balance between positive and negative space.

STEP 3: OUTLINE WITH BLACK MARKER

STEP 4: Next- cut the drawing apart into 3-5 puzzle-type sections.
Use straight angle cuts, not wavy lines.
Again, vary the sizes and shapes, but nothing too small. Outline all the edges with black marker.

STEP 5: Then, re-arrange the pieces into a new composition: a fragmented version of the original drawing.
For the final, take another piece of paper the same size as the original (about 12 x 18"), and carefully place it ON TOP of the cut pieces. Carefully trace, with a black marker, the entire composition including the edges of the cut paper. 
STEP 6: Finally, color in the design with oil pastels.
Choose 3-4 colors for the objects and then 3-4 contrasting colors for the background.
You should practice blending these colors together beforehand with your fingers.
You should work on creating value changes and soft gradations which is a typical characteristic of the Analytical Cubist style.

FINISHED EXAMPLES:


5th- One Point Perspective
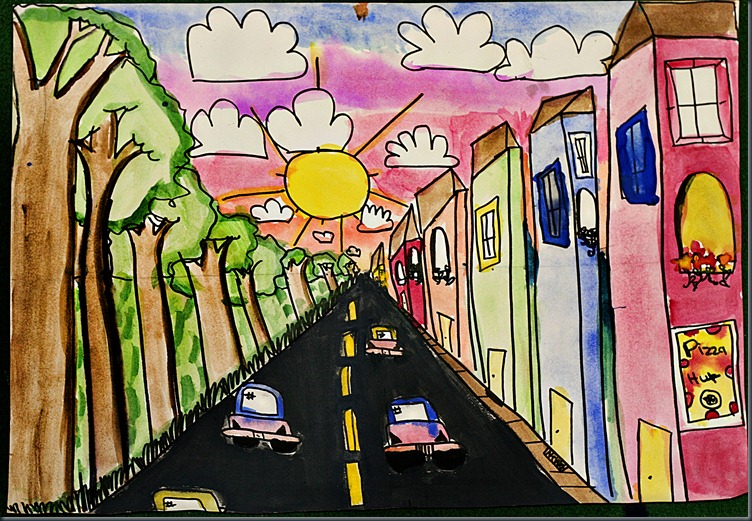
One point perspective is a drawing method that shows how things appear to get smaller as they get further away, converging towards a single 'vanishing point' on the horizon line. It is a way of drawing objects upon a flat piece of paper (or other drawing surface) so that they look three-dimensional and realistic.
Drawing in one point perspective is usually appropriate when the subject is viewed ‘front-on’ (such as when looking directly at the face of a cube or the wall of building) or when looking directly down something long, like a road or railway track. It is popular drawing method with architects and illustrators, especially when drawing room interiors.


Activity:
Today you will begin creating a drawing in one point perspective.
Use the steps from the website below to help you create your one point perspective drawing.
After you finish the steps in the tutorial, be creative and finish your drawing how ever you would like.
Color your piece and turn into Artsonia.
 |
| This is the basic drawing |
After you complete the basic drawing, finish it in a colorful, creative way.

Subscribe to:
Posts (Atom)